Accidental file deletion is often reversible, but speed is crucial. The moment you realise a document, folder, photo or spreadsheet has vanished, the clock starts ticking. Your operating system does not wipe the data immediately – it merely marks the space as available for new information. That window of opportunity is real, but it shrinks with every action you take on the same drive. The single most important rule is simple: stop using the affected drive. If the deleted file was on your main Windows drive, avoid installing new software, copying downloads, saving documents, or running large updates. If it was on a USB stick, SD card, external hard drive or secondary partition, unplug it or stop writing to it straight away.
Stop everything – the golden rule
Deleted files are recoverable only until their old storage space is overwritten. Think of it like a parking space: the car has left, but the painted lines are still there. Once another car parks in that spot, the old space is no longer available. File recovery works the same way. If Windows has not reused the space, recovery software can still find and rebuild the file. If that space has been overwritten, even the best tool has far less to work with. A common mistake is downloading a recovery program onto the same drive you are trying to recover from – that can accidentally overwrite the very files you want back. Where possible, download and install the recovery software on a different drive, then recover the files to another location as well. Never recover files back to the same location you are scanning unless there is no other option.
Continued normal usage is the biggest threat. Browsing the web, installing apps, editing files, downloading videos, and even letting Windows run updates can all create new data. If that new data lands where your deleted file used to be, your recovery odds drop sharply. This is particularly critical for solid-state drives (SSDs), which use a feature called TRIM. TRIM tells the SSD which data blocks are no longer needed and can be erased internally – it can clear deleted data more aggressively than a traditional hard drive. That is why speed matters even more with SSDs. The earlier you stop using the drive and start a careful recovery attempt, the better your chances usually are.
Simple checks before reaching for software
Before moving into recovery mode, check the simple stuff. It sounds painfully basic, but plenty of “lost” files are hiding in places that take seconds to inspect. Start with the Recycle Bin – if the file is there, right-click and restore it. Then check OneDrive, Google Drive, Dropbox, iCloud Drive, or any other sync tool you use. These platforms often have deleted-file recovery areas or version history, which can restore a file that was overwritten rather than deleted. Next, use Windows Search, including partial file names. If you cannot remember the exact name, search by file extension such as .docx, .xlsx, .jpg, .mp4 or .pdf. Sort by date modified to see whether the file was moved rather than deleted. Also look in Downloads, Desktop, Documents, Pictures, and any project folder where you may have dragged it by accident.
If the file came from a camera, phone, drone, dashcam, or voice recorder, check whether the original device still has a copy. Many people delete from the computer and forget the media card still contains the original file. Likewise, email attachments are often recoverable by searching your sent and received mail. These checks do not replace proper recovery software, but they can save you time and reduce the risk of writing more data to the affected drive.
Using data recovery software – a practical approach
Recovery software is worth trying when a file has been deleted from the Recycle Bin, a folder has vanished, a USB drive has been formatted, an external drive is readable but missing files, or a memory card has been cleared by mistake. It can also help when a drive is still visible in Windows but the file structure is messy or incomplete. The key point is that the device must still be physically accessible. If a hard drive is clicking, failing to spin, not detected at all, or has suffered liquid or impact damage, professional data recovery may be a safer route.
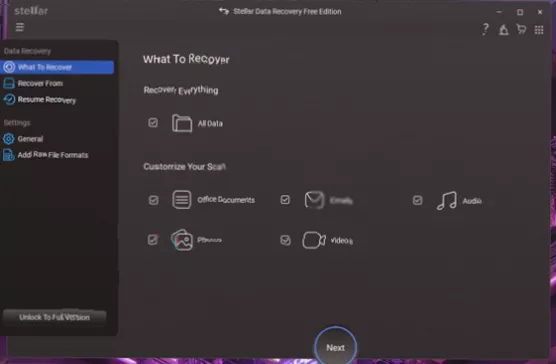
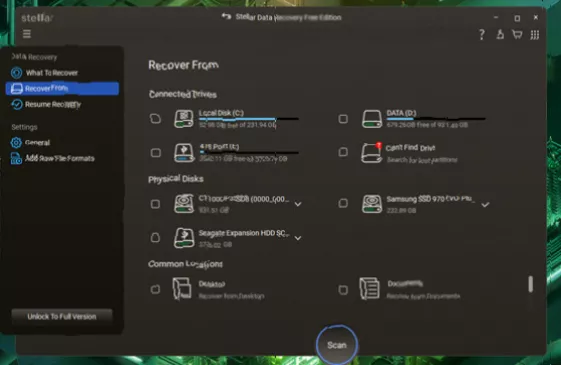
For everyday accidental deletion, a DIY tool is usually the fastest first attempt. Stellar Data Recovery Free Edition is built around a straightforward scan, preview and recover flow. It opens with plain choices: what you want to recover, where you want to scan, and where you want to save the recovered data. That matters because someone who has just deleted an important file is not usually in the mood for technical menus and cryptic disk language. The Free Edition can recover documents, photos, videos, audio files, folders, and other common file types. It supports recovery from internal drives, external storage, USB drives, SD cards, and other connected media. It also works with multiple file systems including NTFS, FAT, exFAT, APFS and HFS+, and can handle BitLocker-encrypted drives.
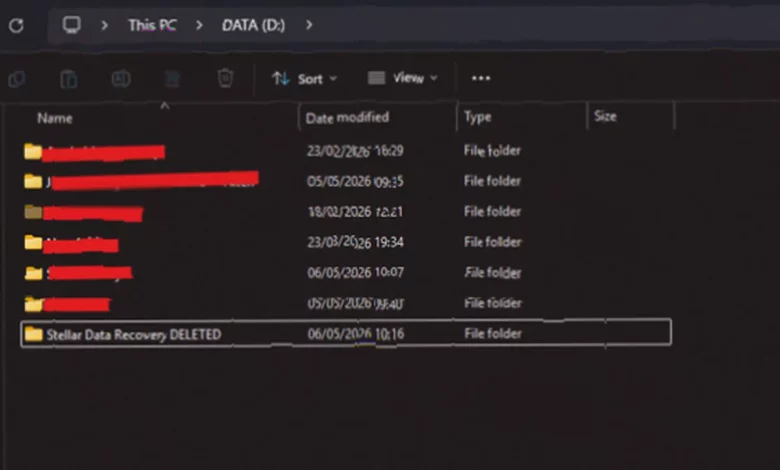
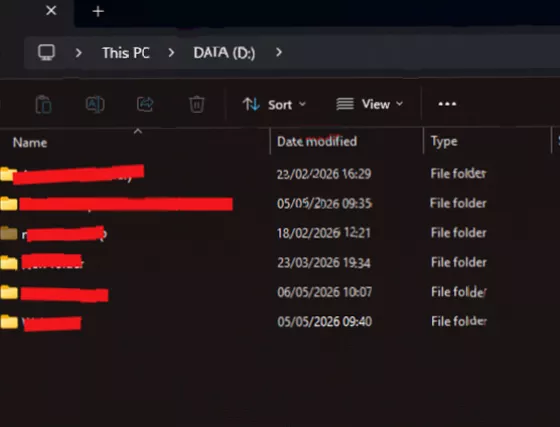
The standout feature is a 1GB free recovery allowance. That is enough for a lot of common emergencies: a batch of documents, several PDFs, a folder of photos, or small project files. (The free version also has a 100MB file size limit per file.) The limit is important because you can test the software on a real problem before deciding whether you need anything more advanced. If your missing data is under that allowance, you may not need to upgrade at all. If you are dealing with a large video archive, a formatted drive, or multiple folders of business data, the free version still lets you scan and preview before making the next decision. The scan usually finishes quickly in quick mode, but a deep scan can take several hours on larger drives. In a real-world test – deleting a folder from a data drive and then scanning with Stellar – the software displayed a file tree of recoverable items, allowed previewing, and successfully restored the folder to a separate destination. The process was simple enough for a non-technical user. However, recovered files may sometimes lose their original filenames or folder structures, appearing with generic names.
Several other reputable free tools are also available. EaseUS Data Recovery Wizard Free offers up to 2GB of free recovery. Disk Drill gives a 500MB free trial on Windows. Recuva is a long-standing, user-friendly option. For advanced users, TestDisk and PhotoRec are powerful open-source tools with a steeper learning curve. DMDE Free Edition has limitations on file recovery batches. But for a clear, guided experience with a practical free allowance, Stellar Data Recovery Free Edition fits well into the first-response workflow.
When professional help is the safer bet
DIY recovery software is not the right first step for every situation. If the drive is making clicking, grinding, or beeping noises, stop using it immediately. If the drive is not detected by the computer at all, repeatedly reconnecting it can make the damage worse. If the missing data is extremely valuable, legally sensitive, or business-critical, a professional recovery lab may be the safer choice. The same applies after physical damage, water exposure, smoke damage, or a dropped external drive. Software is designed for logical data loss – deletion, formatting, corruption, or missing partitions where the hardware is still functioning. It cannot fix a physically failing disk. In those cases, the smartest move is to power down, disconnect the device, and get specialist advice before doing anything else. In the UK, professional data recovery services operate under GDPR regulations and employ advanced clean-room techniques for complex recoveries.
Prevention – the boring advice that works
Once you recover the missing file, take a few minutes to make the next accident less stressful. Use a simple 3-2-1 backup approach: keep at least three copies of important data, on two different types of storage, with one copy off-site or in the cloud. For most home and small business users, that can be as simple as a local external drive plus cloud backup. Turn on version history where available – OneDrive, Google Drive, Dropbox and many backup tools can preserve earlier versions of documents, which is incredibly useful when a file is overwritten rather than deleted. For photos and video projects, copy camera cards to at least two locations before formatting them. For business documents, avoid storing everything in one local folder with no backup. It is boring advice, but it is the kind of boring that saves your backside later. It is also worth keeping a trusted recovery tool bookmarked before you need it. When something goes wrong, you are less likely to grab the first random download from a search result. Having a known option ready means you can act calmly and avoid making the situation worse.
Remember: the moment after deleting the wrong file feels dramatic, but the first response should be boring and controlled. Stop using the affected drive, check the obvious recovery locations, avoid writing new data, and only then run a careful scan. That calm first response can make the difference between a simple recovery and a permanently lost file.